
Introduction
In the first week of our emerging technology assignment, we discussed how to consider narrative in immersive environments and the overall use experience. This included how games should be designed with a good user experience in mind and how in VR (virtual reality) and AR (augmented reality) the factors that affect a user’s experience are different to regular games and software. This is because by placing the user in the scene the intention should be to create a new “reality” for the user that makes them feel as if they are actually in a different place. That it is important for the virtual world to make sense in terms of the consistency and general feeling of the environment. If it is inconsistent or done incorrectly then the user is able to see the cracks in the “reality” and it is not as immersive.
When creating a virtual reality there are many considerations and elements to think about to create a scene. Things such as how differences the player’s perception may lead to them taking in different information and creating a different experience, or opinion on the world as with a wider range of vision or more things to see. A person is bound to see less details in each part but have a better feeling of the scene as a whole, whereas with a smaller range of vision it is easier for the player to focus on the finer details as there is less to draw their attention.
Week 1 Activity
The first activity we
were given was to use maya to create a 360 video and to try the mash system.
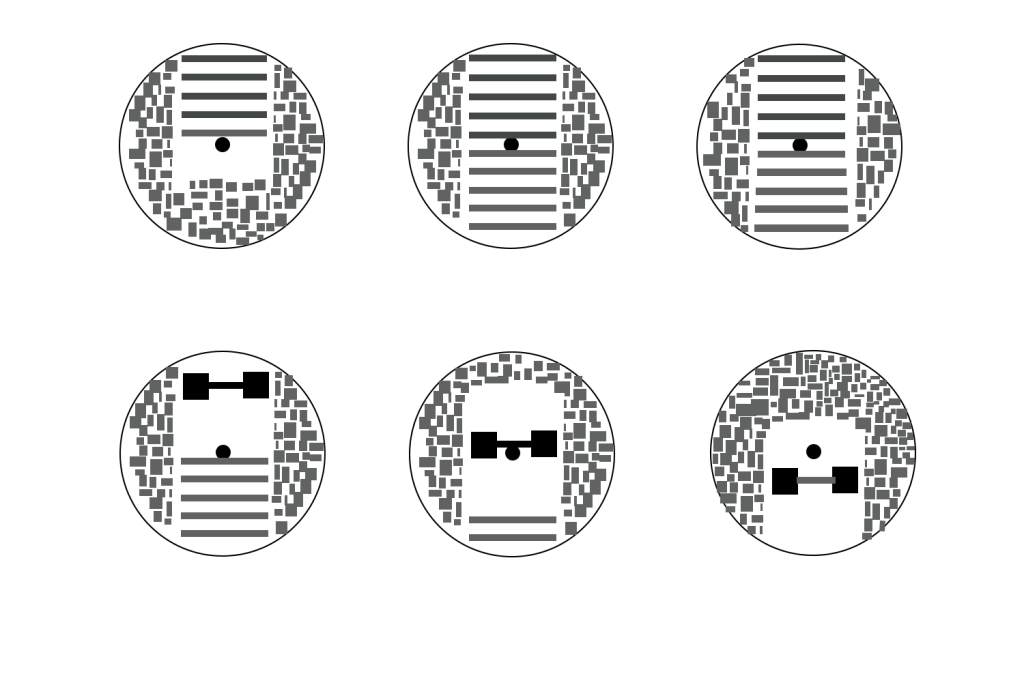
The first step of creating a 3d scene was to come up with a rough idea of the
scene and create a storyboard. For 360 videos a storyboard is arranged in a
circle with the viewpoint in the centre.
For my first simple scene I wanted to create a scene in which the camera flies in between skyscrapers in a city, however I later on adjusted my plan to include the camera crashing through a wall. Once I had settled on this idea I started to create a storyboard.
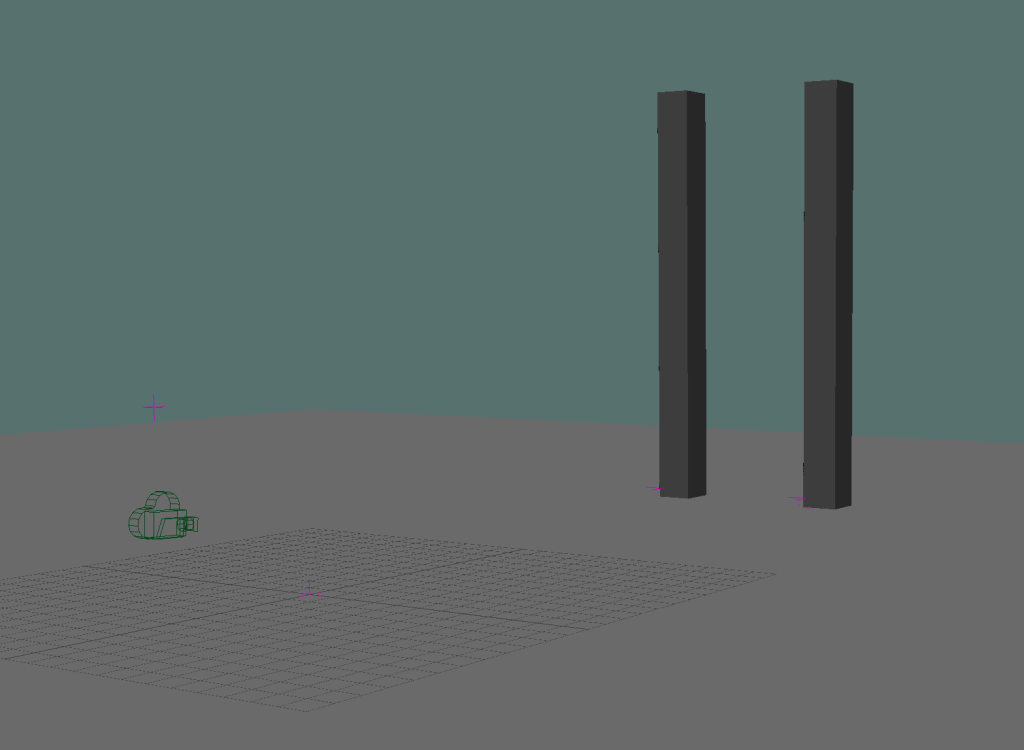
I started by creating a basic scene in maya by making a simple plane as the floor and then forming the skyscrapers for the camera to fly between with a simple cube that I adjusted and changed the size of to fashion the first two tall skyscraper shapes, that the camera will fly through. Next, I added the camera and changed it to a 360 camera with the mode set as over under, and then changed the render settings to the suggested settings and keyframed the movement of the camera.
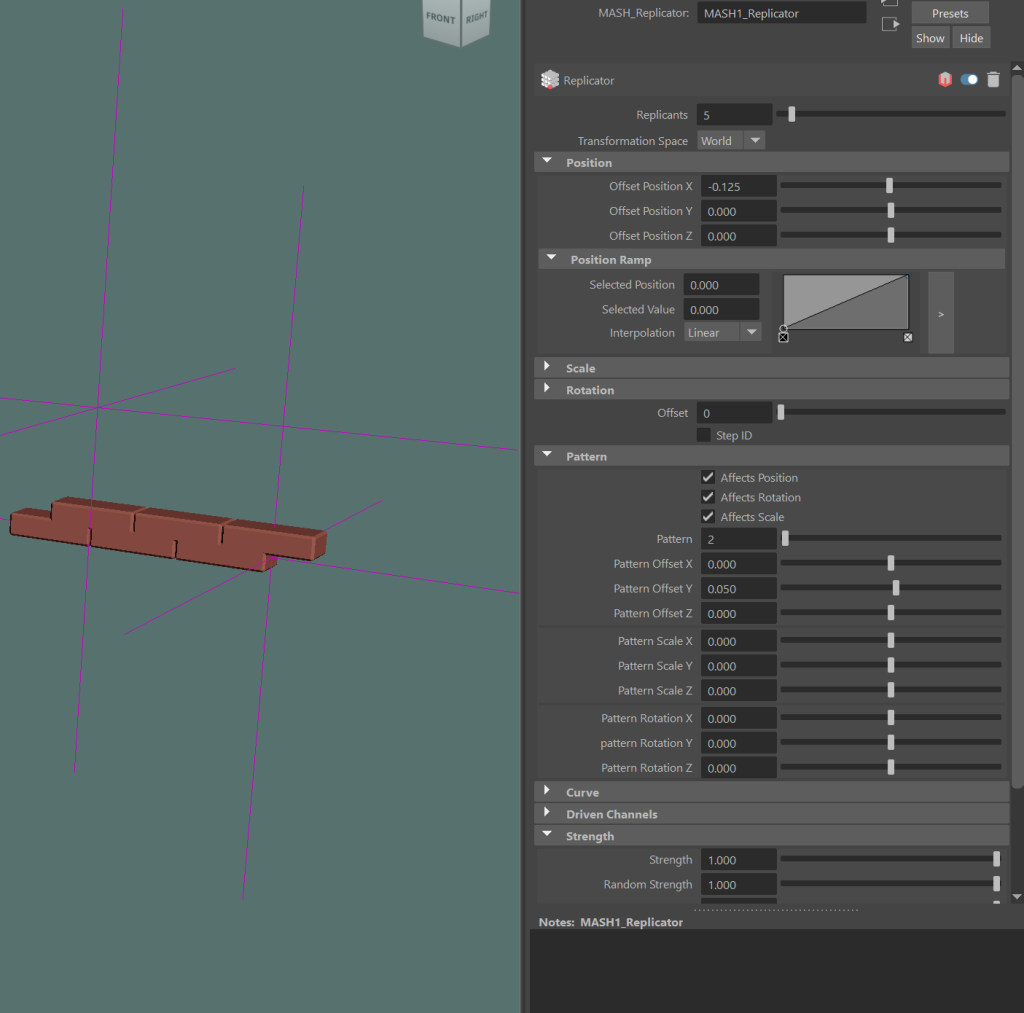
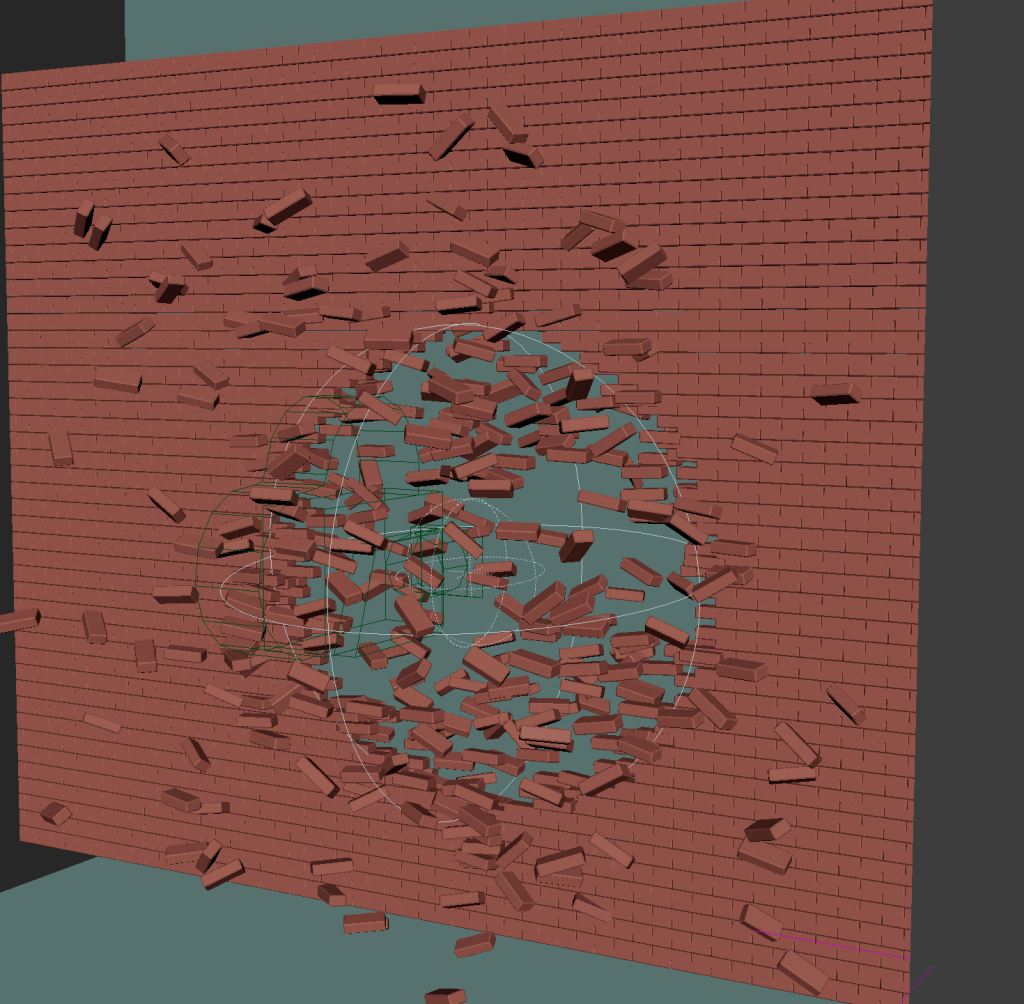
Next I followed the tutorials oh how to use the mash network and created a brick wall that has a destruction effect when the camera flies close enough. I achieved this effect by creating the shape of a single brick and then creating a MASH network with it.
In the MASH network I added a replicator node and the adjusted the offset Y position. This meant that each copy would be placed in the x coordinate with the selected value added to place it next to previous replicants. Then in the pattern section I added a pattern offset Y with a pattern of 2. This means that every other brick would be raised by the selected value, with this the first two rows of bricks could be created and made longer by changing the number of replicants.
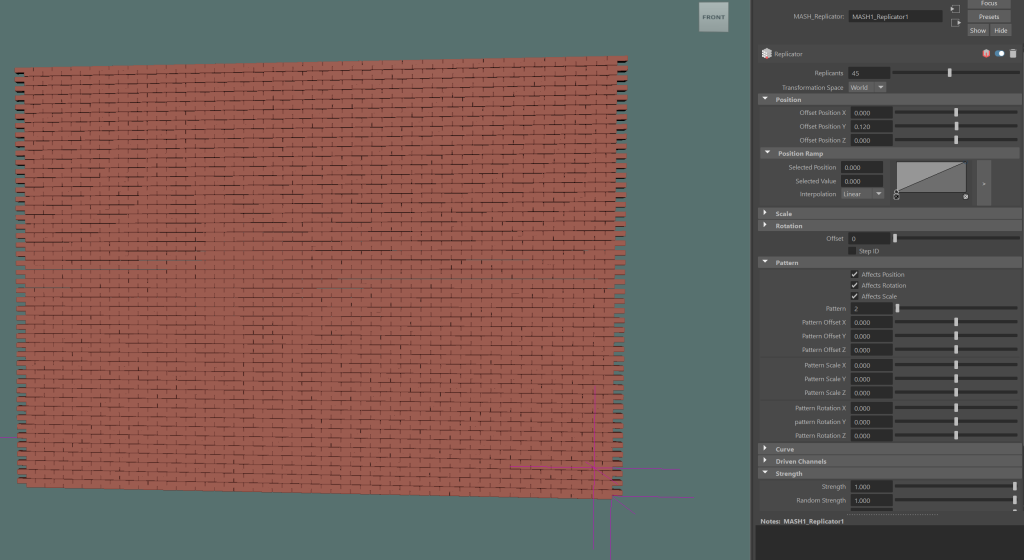
To make the wall taller I added a second replicator node and instead of adjusting the X value of each copy I set it to increase the Y value of each, so that it would replicate not only the original brick but the results of the previous replicator node too, this creates the completed brick wall effect.
After creating the brick wall effect it was simple to create the destruction effect. This was achieved by adding a random node and adjusting the random variation to a value, that I felt looked like something had crashed into and destroyed the wall. Then to limit this effect to a specific area and time I created a shape in the “falloff object” section. What this did is return the wall to normal, but when the random falloff object intersects with the wall the area that overlaps is affected by the random node.
Using this I attached the falloff object to the camera so that when the camera moved then so did the falloff object. As a result when the camera crashed into the wall then it exploded around the camera, and after the camera had passed through then it returned to normal.
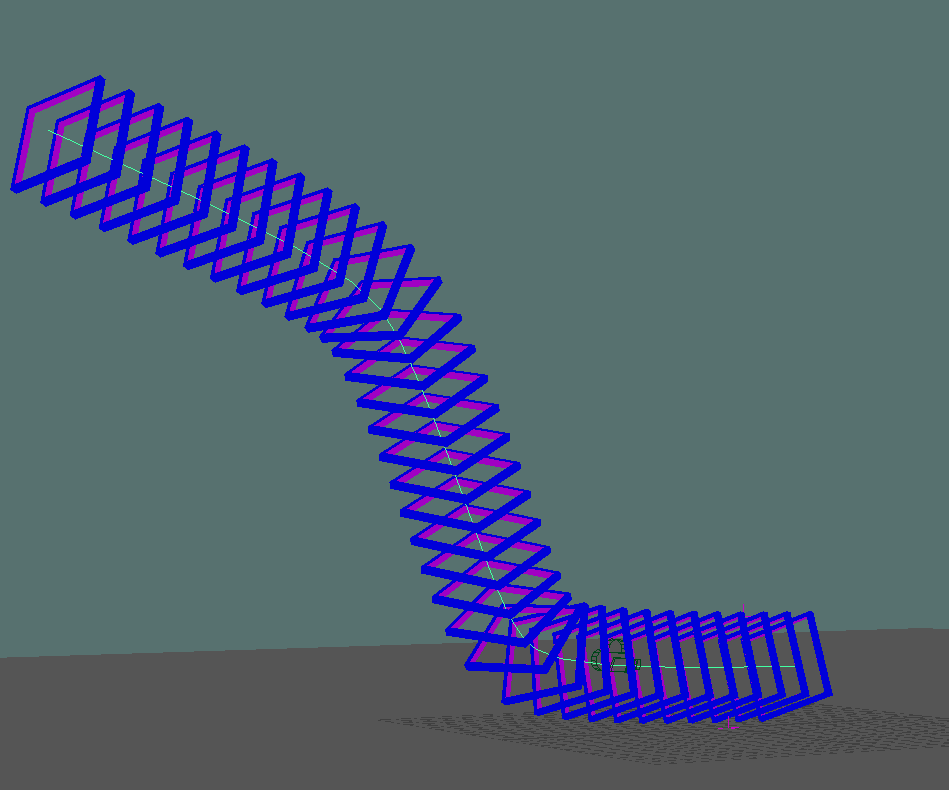
After I created the wall that the camera would crash through I followed the next MASH tutorial that showed us how to create a set of rings or objects that follow a path. With this I thought that I would add a tunnel of rings for the camera to fly through before being sent out and then crashing into the wall.
I chose to include this in my scene as I felt that it added something else for the viewer to look around at during the video rather than an excessively repeating city.
To create this effect I started with a basic pipe shape and changed the size and number of faces so that it was just a square. Then I added a colour to the faces with a different colour on the inner facing faces. I created the mash network using the pipe. The next step was to separately use the CV curve tool to draw a line curve that I wanted the path of pipes to follow. Then add a curve node to the MASH network, with the curve node I dragged the curve that I created into the input curves section. This caused the pipes that were created in the mash network to follow the path of the curve that I had drawn.
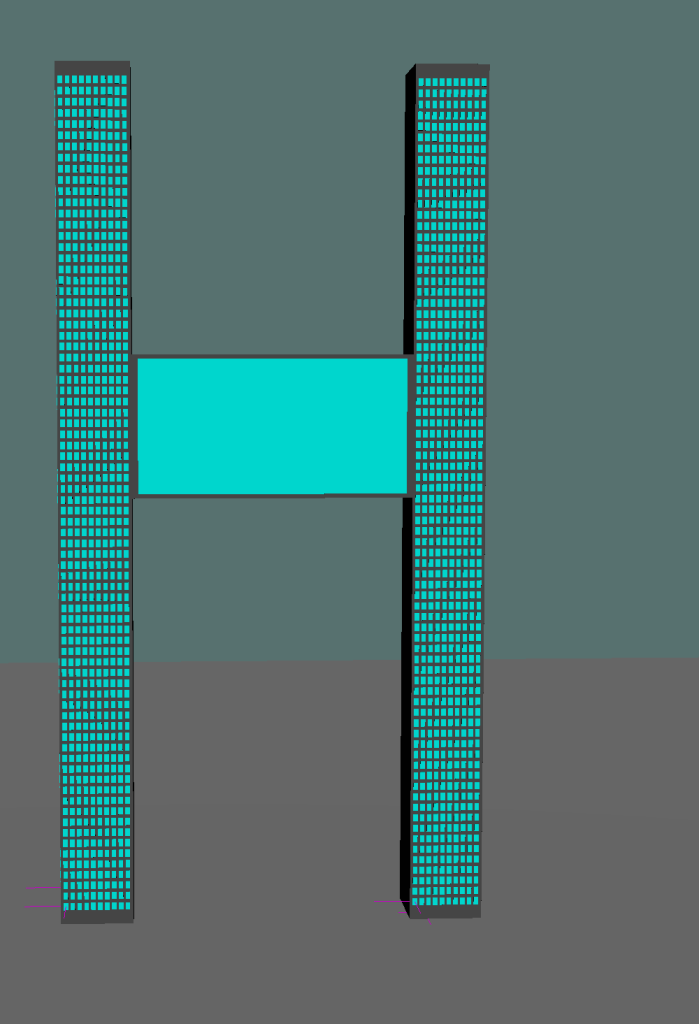
When I had created the tunnel of rings and added the colours to the rings, I realised that I did not love the design of the two skyscrapers. I felt that by having the camera fly into two similar towers it was too similar to a real life tragedy and I was not comfortable with this. To change this I added a connecting bridge to the towers and as they were still just grey blocks. I thought that I would use Mash again to add windows to the skyscrapers.
The method to add the windows was very similar to how I created the bricks, I added the bottom row of windows with the basic distributor node, and tried to space them properly to create the effect that things in the scene were massive compared to the size of a regular brick wall or floor of a building.
After creating the bottom row I added a replicator node and added replicants above the original row to create the desired skyscraper window effect. After I did this on one side I added a second replicator node and only had one copy, then I moved it so that it would be on the other side of the skyscraper. I repeated this process to add windows to the front and back faces of the other tower and did the same a final time but, adjusted the distance between the sets of windows to cover the outer faces of both skyscrapers. I did it this way because I did not want to have a separate network for each and every side of the skyscrapers as I felt that it would unnecessarily fill in the mash network list.
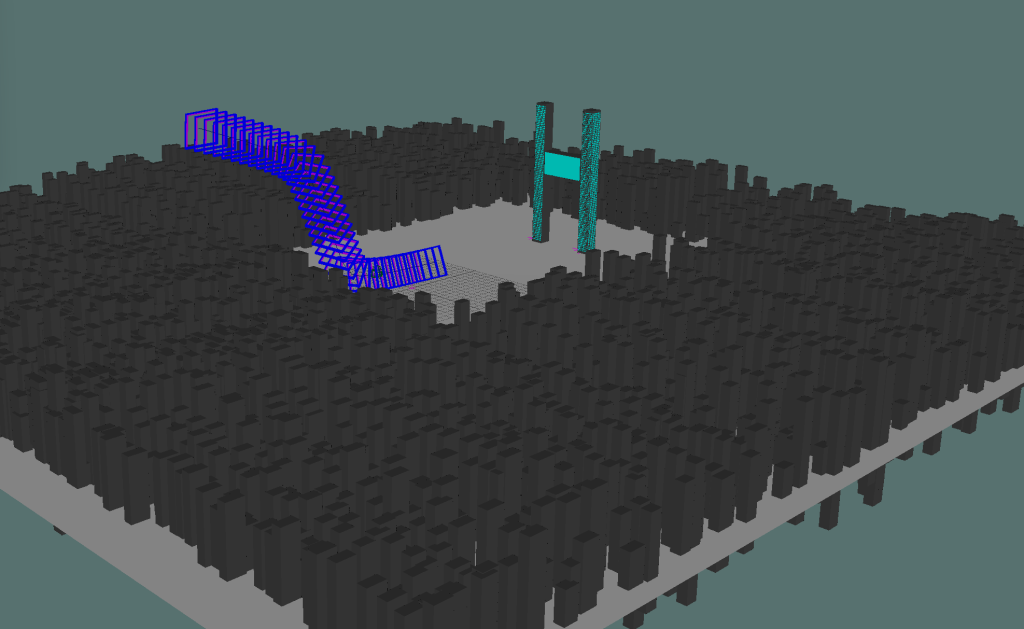
The final thing that I had to add to complete my scene was the buildings in the background of the city. For this I once again used MASH, by using what I had already done it was simple, as I added a large cube and created replicants to the side and behind it. Finally using a random node I added a some variation in the height and width of the buildings as well as the distance between them. I did this another three times to create a square around the path that the camera takes.
After I created my scene and felt that it was ready to be rendered, I ensured that the camera was set to be a 360 camera, and that I had properly set the rendering settings and then rendered the sequence. Once I had the sequence rendered I used adobe premier pro and imported the first frame and enabled import as sequence to add every frame of the video. Then when I was exporting my video from premier pro in the export settings I enabled the “video is vr” setting and changed the frame layout to be “Stereoscopic – Over/Under”, so that it matched the orientation of the maya camera.
After exporting my video I uploaded it to YouTube so that my 360 video is viewable.
Week 1 Result
Week 2 Activity
The week 2 activity was to try using frameVR to create a virtual portfolio of our work and to play around with a different and more interactive VR/360 scene. Actually creating my frameVR portfolio was simple, after creating an account I simply created a new frame, when I was in my frame environment there was several walls that I could edit by adding websites or links to YouTube videos.
After playing around and exploring what I could do in frame I started to add my previous works to the scene, for example I added all of my animations that I created last year to some of the walls as well as the video of my vfx work. Additionally a recording of a game prototype I made for a group project, and I also added my 360 video that I created the week before and a link to the blog post that I made for my postproduction and vfx.
I later figured out that it was possible to import and place 3d models that I had created into my scene. To do this I had to export the model as an fbx from the software I modelled it in which was maya or zbrush as a .fbx file and then import the .fbx file into blender. After the model was in blender I had to export the model again from blender but this time as a .glb file, however I did not know how to properly keep the texture of my model when moving it from maya to blender and then to frame so the textures of my models sadly were not transported.
After I found this out I started to add some of the models that I had made to my frame. I ended up adding two different variations of my character model, as one had much more detail as it was the model used to bake the texture on to my final model. The other was the one that I used for my animations that had less detail and a lower polygon count, sadly as they did not have the texture it simply showed the difference in the texture of the character in the fur and higher detail clothes of the character.
I also added some assets that I had made for my level design module which were some simple flasks and a mortar and pestle. These also had sadly lost their colouring but I still chose to add them in the scene just to add some more objects to the environment that felt empty.
Week 2 Frame Link
My frame can be found and viewed at Frame