
Introduction
For 3d character Animation the assignment we were given was to create a set of three different action sequence animations that match the character’s personality and theme each with a minimum length of 10 seconds, I decided to use my character from 3d character design as i already had an idea for the character’s personality and traits, this made it easier to come up with ideas for my animation sequences.
During this module I had to improve upon the previous skills that I learned in maya and learn now skills such as how the weight painting tools work along with how the different layers of the character interact with each other.
This module teaches important skills for animating and understanding how 3 animation works as I only had previous experience with 2d animation and even that experience was very limited, during the animation process I had to think in detail about how the different body parts on a human move in ways that i otherwise would not have considered.
sequence ideas
Due to using the character that I designed and modelled myself I had a starting point or animation ideas that fit the theme of the character, these ideas originated from the fantasy and dungeons and dragons theme of the character and many of my original ideas heavily incorporated the axe that the character wields such as different attack sequences with the weapon or other actions such as just placing it down and doing something else for example picking up a different weapon or even just running without having to carry around the giant axe, these ideas all included the axe in some way and while I did want at least one or two of my sequences to involve or revolve around the axe I wanted at least one of them to not include the axe, even if it was a simple running or walking sequence, I wanted to do this so that I could express the character’s personality in a different way that is not possible if the character has the axe.
overhead slam idea
The first idea that I thought of was an axe swing that swing from behind the back and slams into the ground, this uses the weight of the axe to create a more realistic attack due to heavier weapons being more effective when you use the weight to your advantage rather than working against it, i also wanted to do this because I felt that t would be a good way to practice trying to animate the way that oversized or baggy clothes would move due to the robe moving as the character does especially with exaggerated actions such as an overhead slam.
This sequence is heavily inspired by reinhardt’s “hammer down” highlight intro from overwatch as it demonstrates how I want the character to swing the weapon with both the size and weight of the weapon shown, for other references I used the monster hunter series and looked at several of the in game animations as I felt that they had a better proportional size of the weapon and character as in my main reference the character is also large and would react differently due to being a similar size. I feel that monster hunter better showed off how a person would deal with the weight of an oversized weapon when swinging it around.
walk cycle idea
My second animation idea was a simple walk cycle idea, I chose to do this as it was a simple sequence and i did not think that i would be able to do anything too complex due to art and animation being my weak point, however i felt that this would sill be beneficial as it both helped me to understand and demonstrates some understanding of both the wrong and the right ways for a body to move.
I intended for the character to simply walk along in a straight line with the camera moving around them to show how it looks from all angles and although a walk cycle would usually be an easy animation to produce i felt that i may still have difficulties due to the long robe and having to simulate how a robe would move and how the fabric would stretch and be displaced.
pick up axe idea
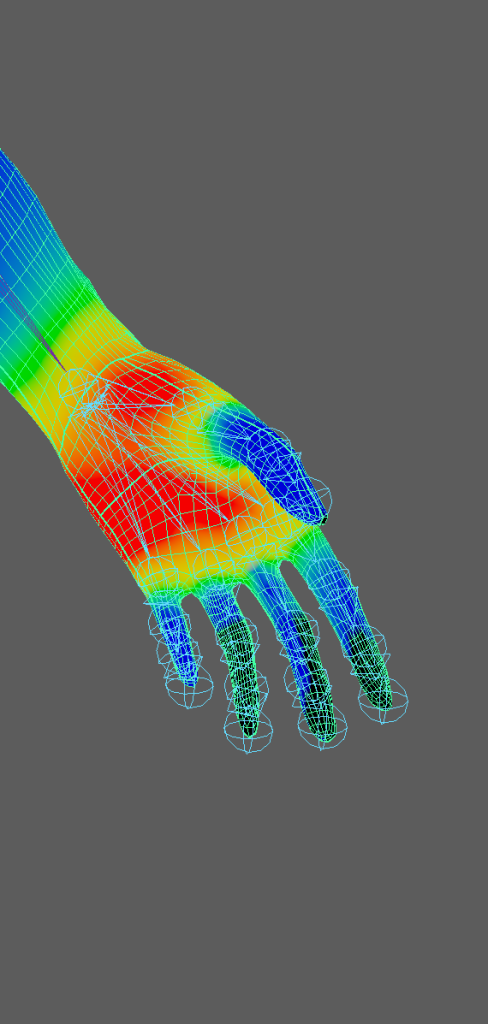
The final animation sequence that i settled on was a sequence in which the character walks up to the axe while the head is buried in the ground and then picks it up and rests it on her shoulder, i chose to do this as it encourages me to learn and demonstrate my learning of things that i otherwise likely wouldn’t for example how a hand opens and closes or exactly how the arm bends to hold something behind the head, for these i decided to mostly use myself as reference as i felt that it would be much easier to do the actions myself as i am animating and then look at the way the the arm and the muscles move and this also helps me understand the limits of the human body for example how far joints can turn and the ways that joints interact that i would not be able to infer from just looking at a video.
creating the skeleton
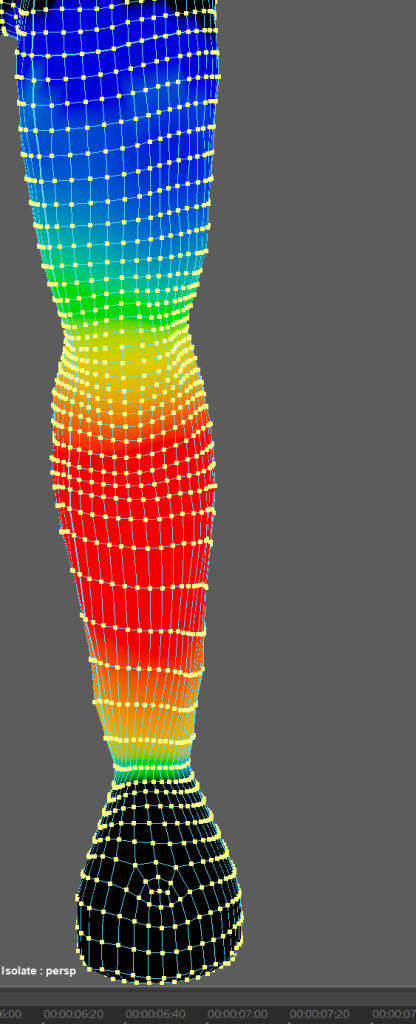
it was fairly simple to create a basic body skeleton rig however due to both the body and the clothing of the character the rig ended up with some minor differences from a regular rig in some places and some major differences in others, for example in a human foot rig there is a bone in the middle of the foot to simulate the bending and arching of the feet, however due to the character having hooves instead of feel that was not possible and ended up being just one bone or due to the robe being so loose fitting it would have to have joints running through it to control the various sections.

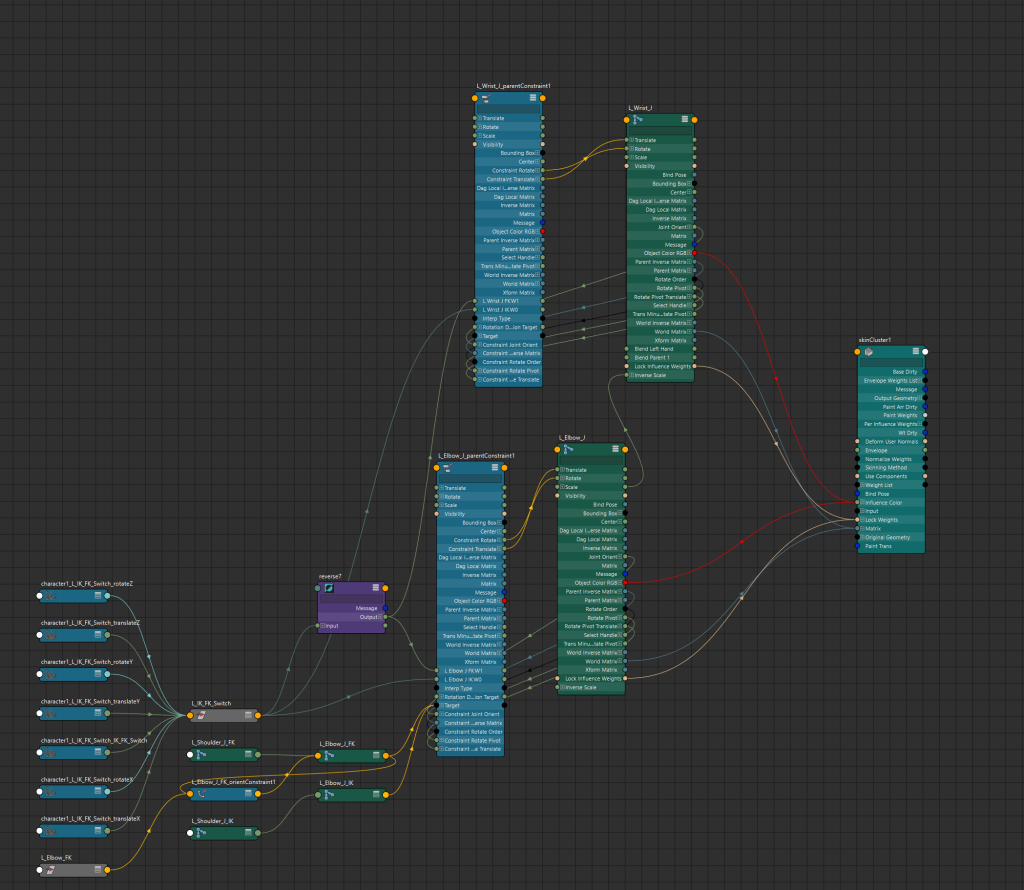
after the bones were in place and all properly connected i started to make the control points for different parts of the character, for example after creating an ik handle from the thigh bone to the ankle i then created a control circle and then using a parent constraint on the ik handle constrained the location to the circle so that when the circle moves as does the handle and therefore the leg, then i created another smaller control point and placed it in front of the knee i constrained the ik handle to it however this time with a pole vector constraint, this is used to control the direction that the knee faces, i repeated this for the other leg and then created control circles around both the waist and the shoulders, after ensuring that they were centered on the character this time using a parent constraint on the joint it allows the control point to move the joint and anything attached to it.
Using control points and constraining the body like this worked in most places, however for the arms it is better to have the option between these two different types of movement, as one allows you full control of each joint and the other automatically controls the way that an arm would bend, in stead of having to choose just one method of controlling the arm i added a way to switch between the methods, to do this i duplicated the shoulder elbow and wrist bones twice to create two copies of each arm, then i set up the ik handles on one and the fk control points on the other with both methods set up i used a parent constraint on the original joins that made it controlled by the two copies joints, however this just caused the original skeleton to stay in the center of the two other arms rather than properly following the movement, to fix this i created a control point to act as a switch between them so i added a variable for what mode it is and in the node editor made it so that the two options of the variable correlate to one of the control methods and made the main skeleton completely follow the activated one while hiding the deactivated one.
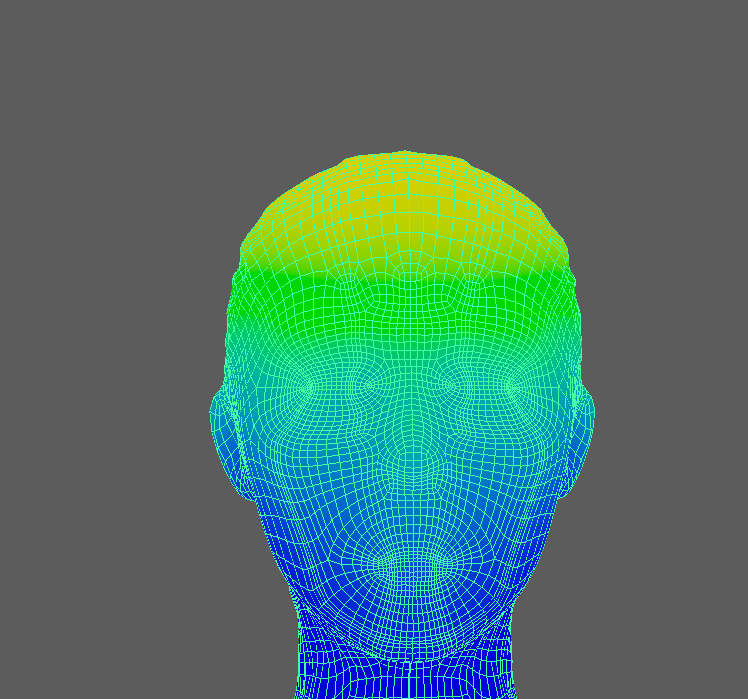
skinning and weight painting
At this point in the process it was suggested that i combined the seperate meshes of my model into one to avoid problems later on so i did that and then selected the mesh and the origin of the skeleton and then using the bind skin tool bound the mesh to the skeleton, this means that the joints that i made can now control the body, maya uses a system of skin weight which means that each vertex has a value of 0-1 and the higher the value is to a joint the more the movement of that joint affects the vertex, on the original skin bind the weight painting was not very good and full of issues, this meant that i had to manually go through and adjust the skin weight of the character, i started this by selecting only the vertexes that make up the body and isolating them, then using reference images of how the body moves and deforms i tried to make the joints look as close to realistic as i could, i then repeated these steps on all of the different layers while keeping in mind how much a material would deform, for example cloth or skin would deform a fair amount with movement whereas a metal plate would not at all deform and instead just move.
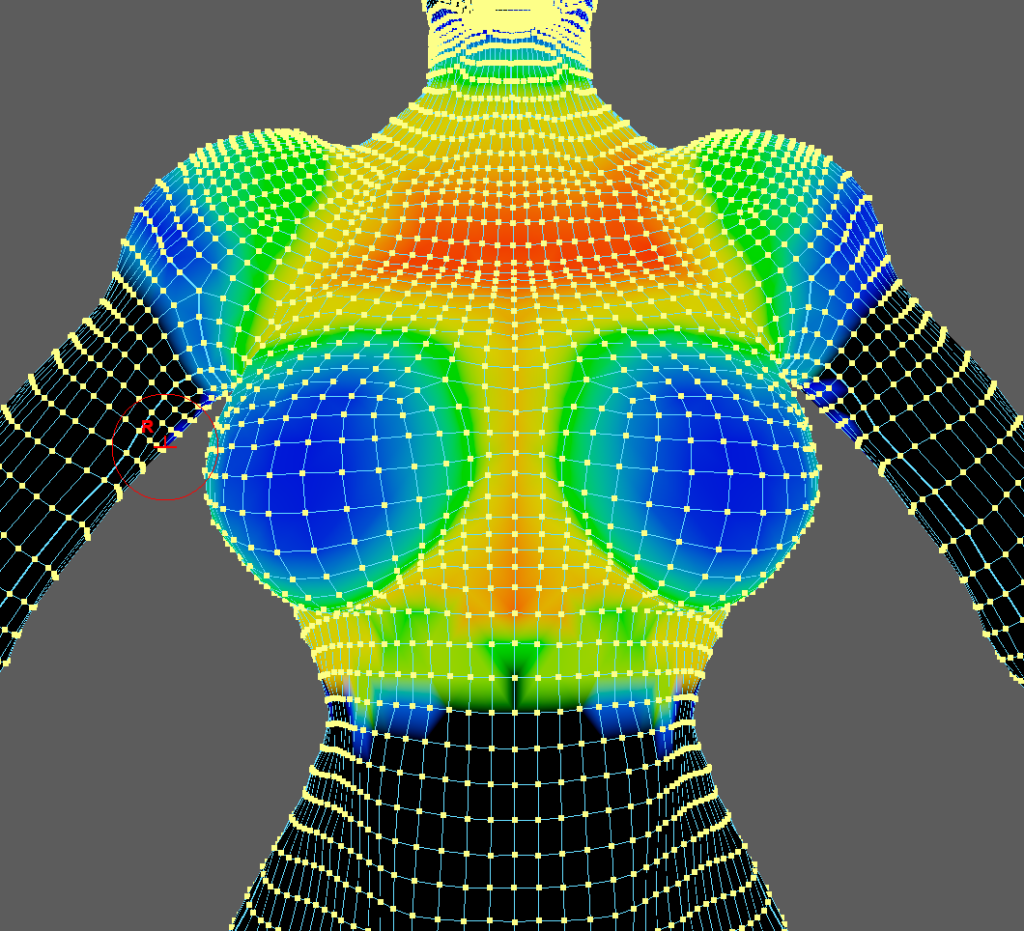
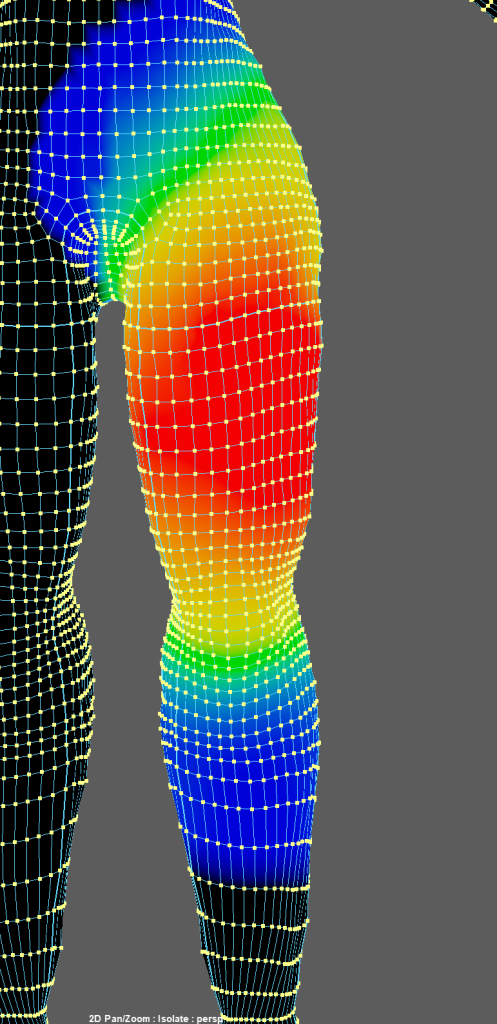
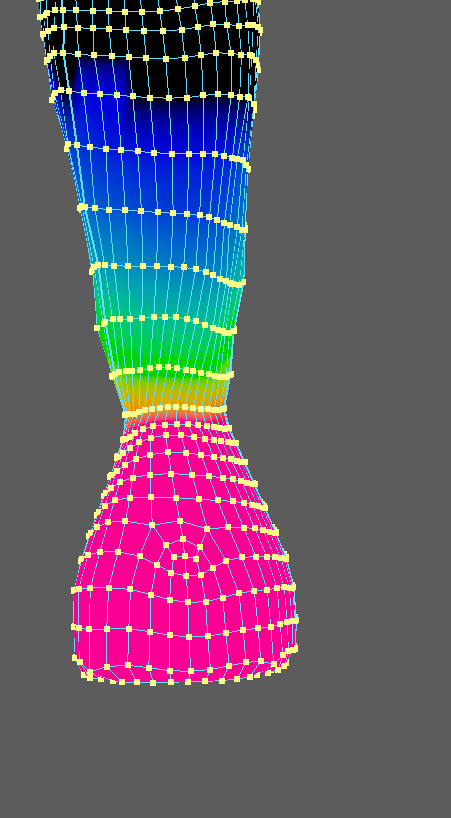
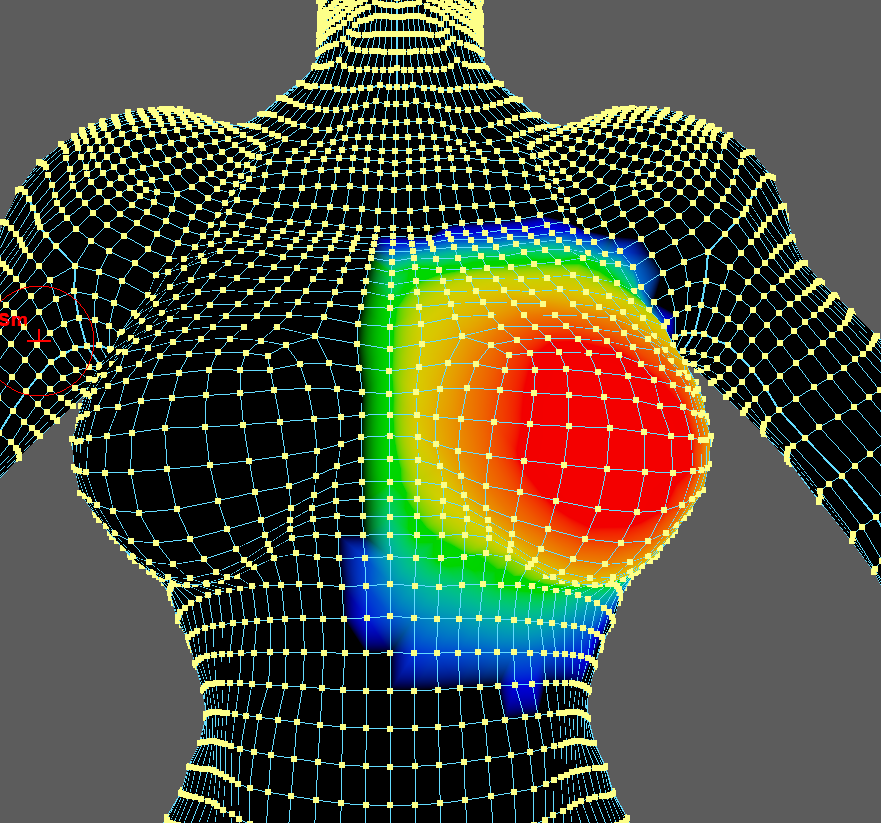
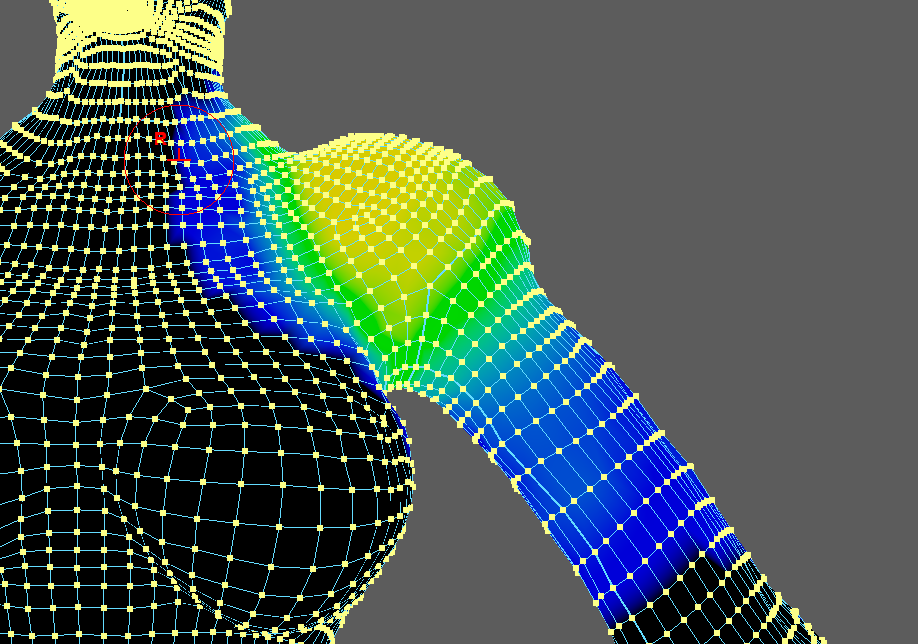
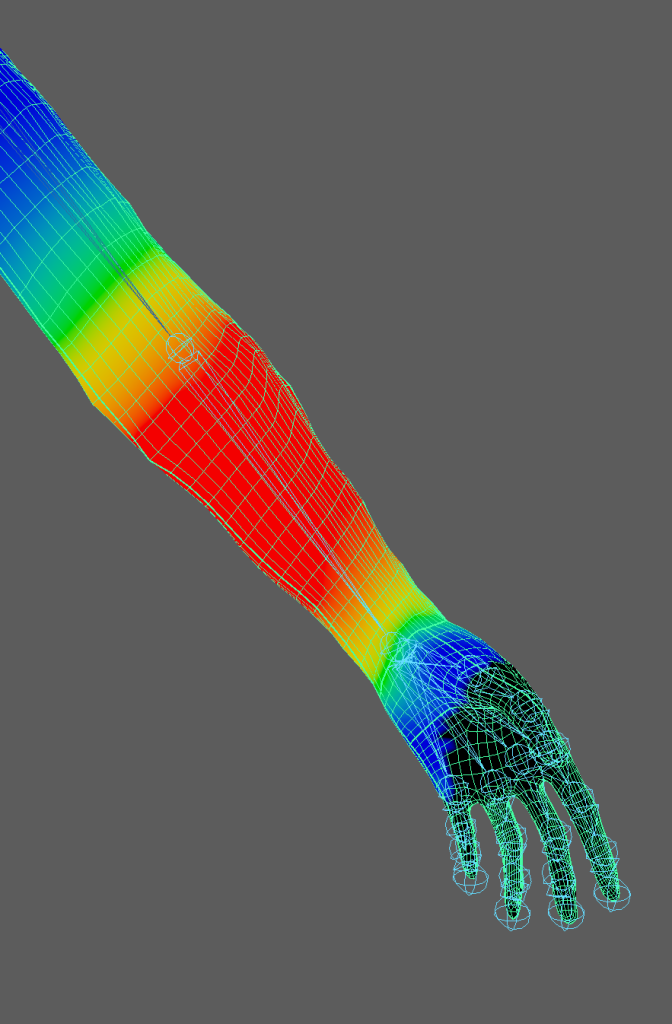
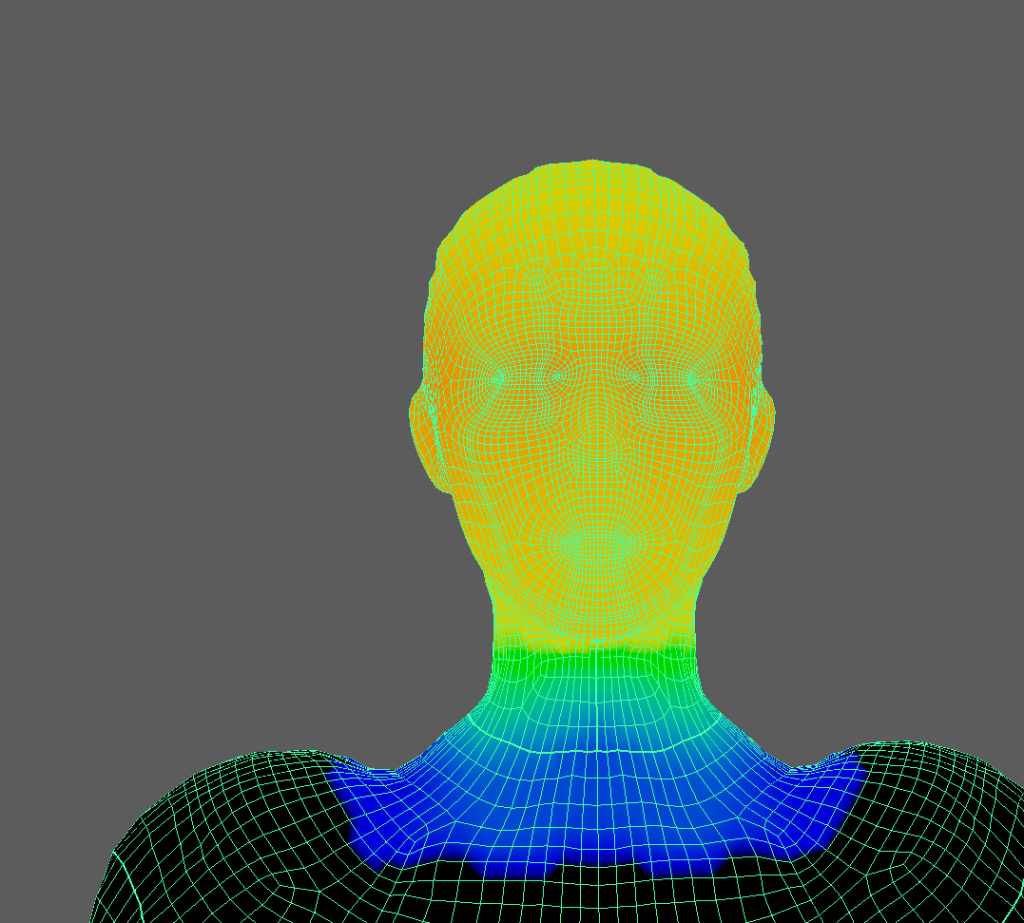
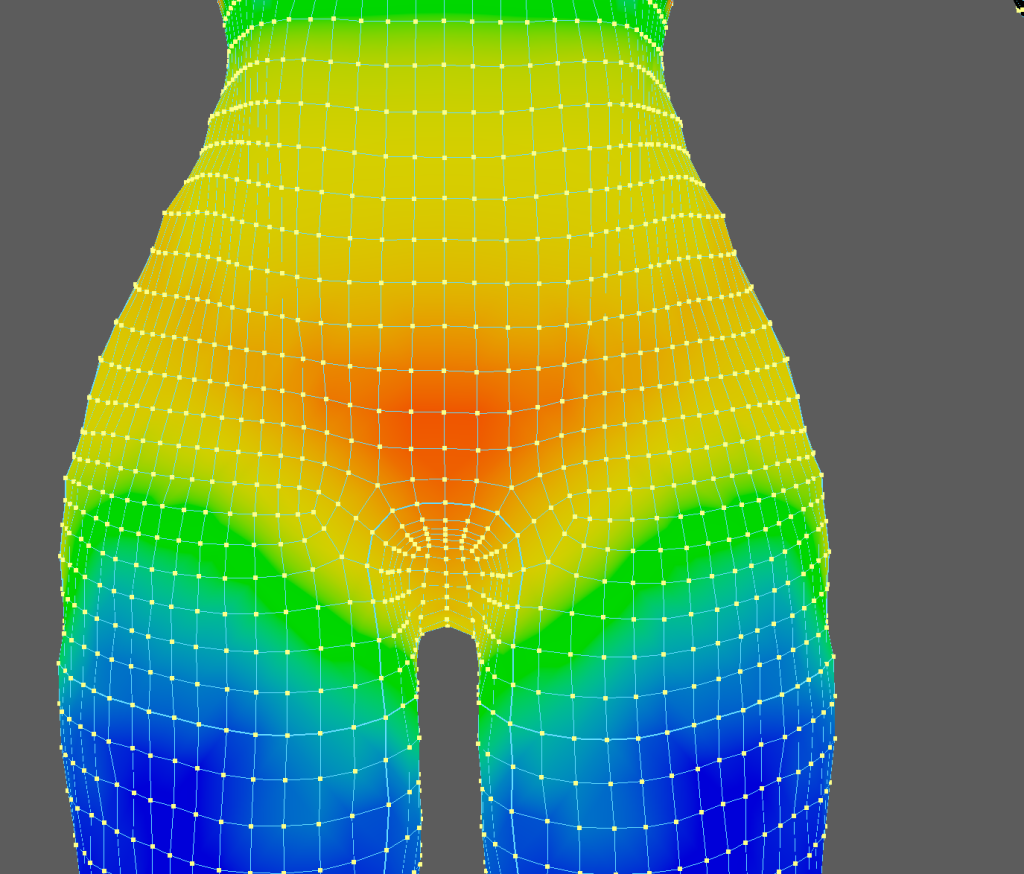

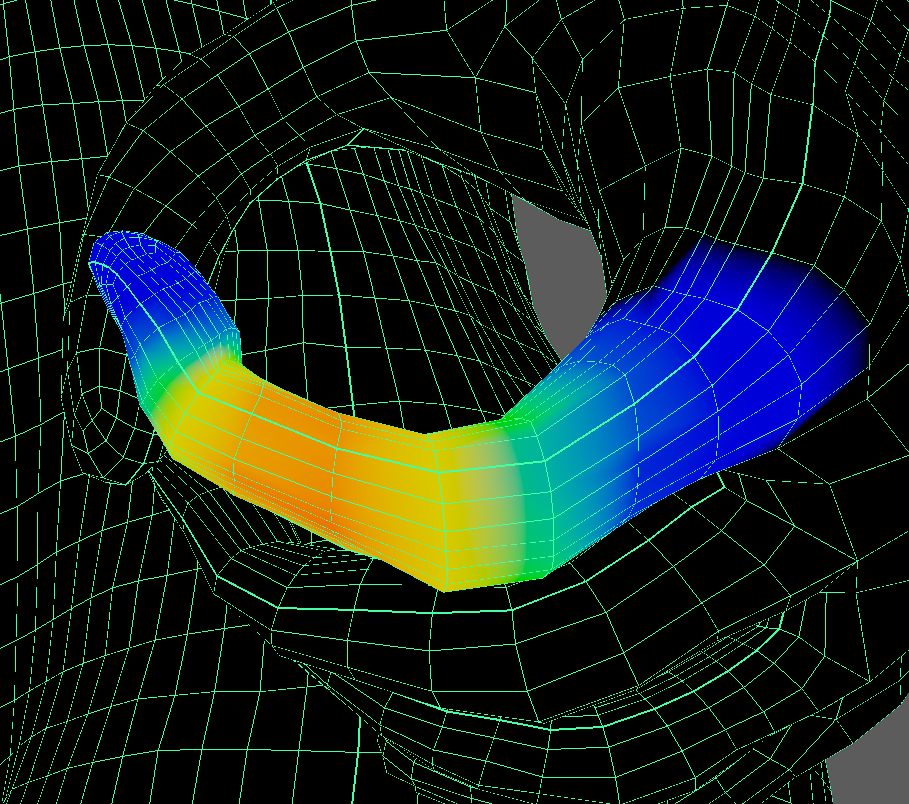
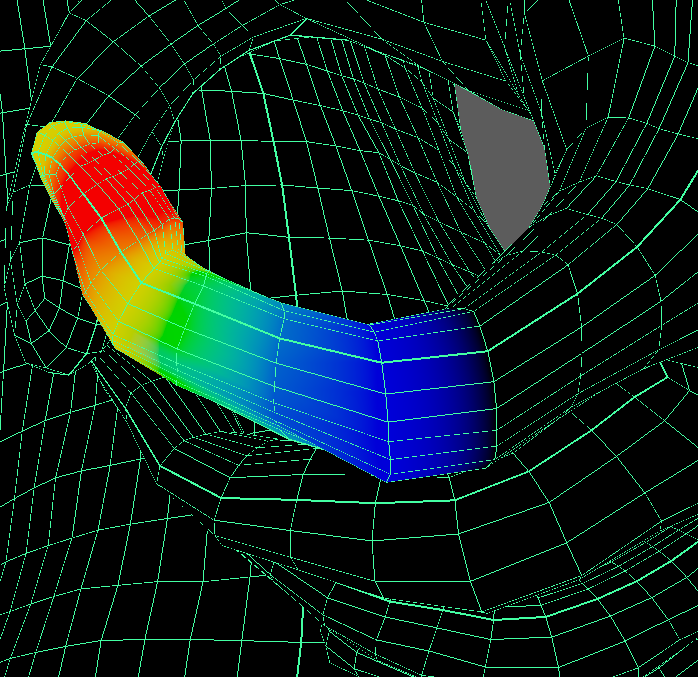
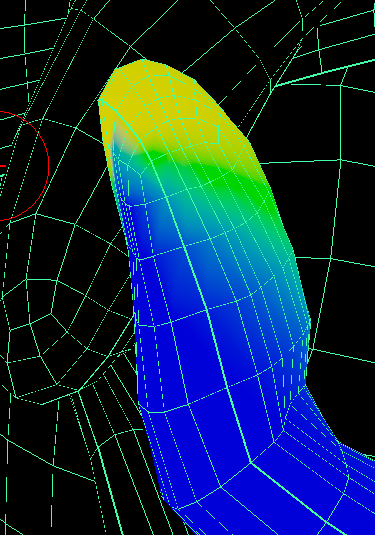
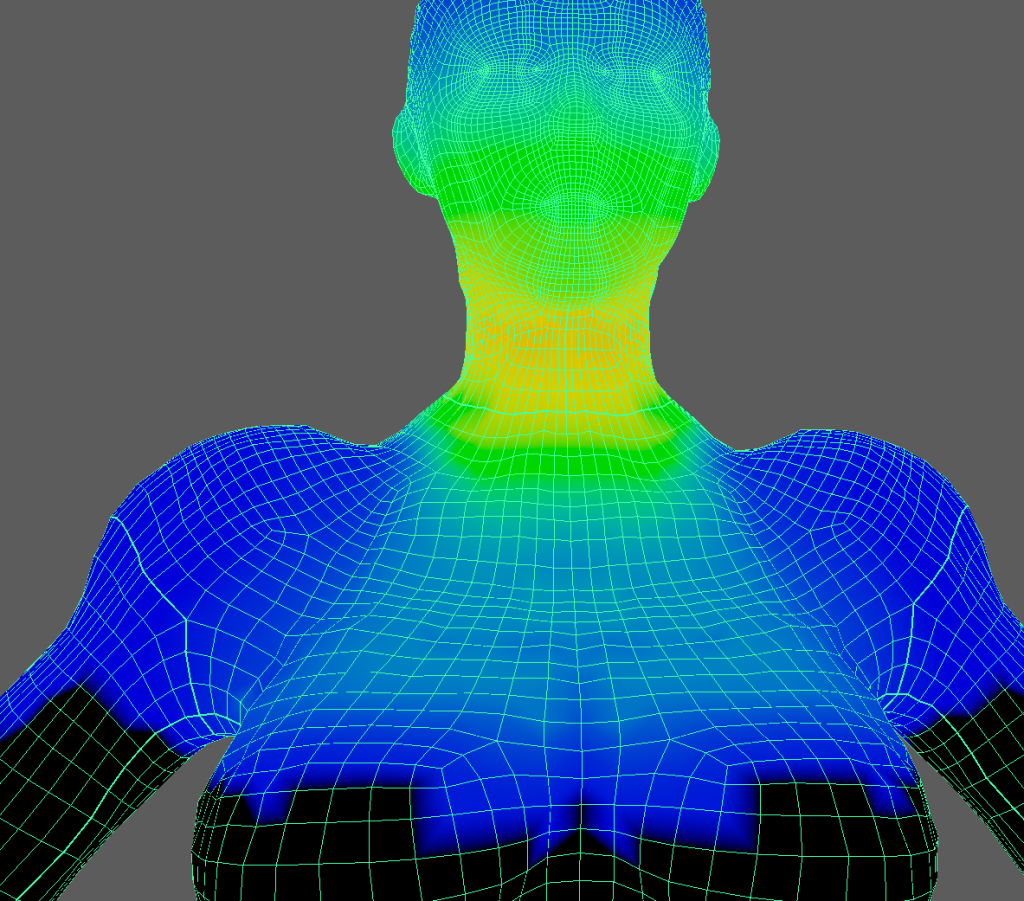
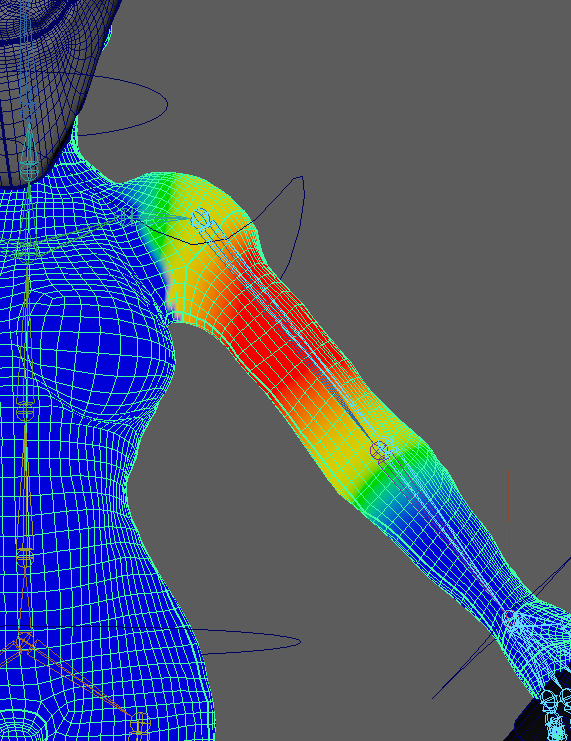
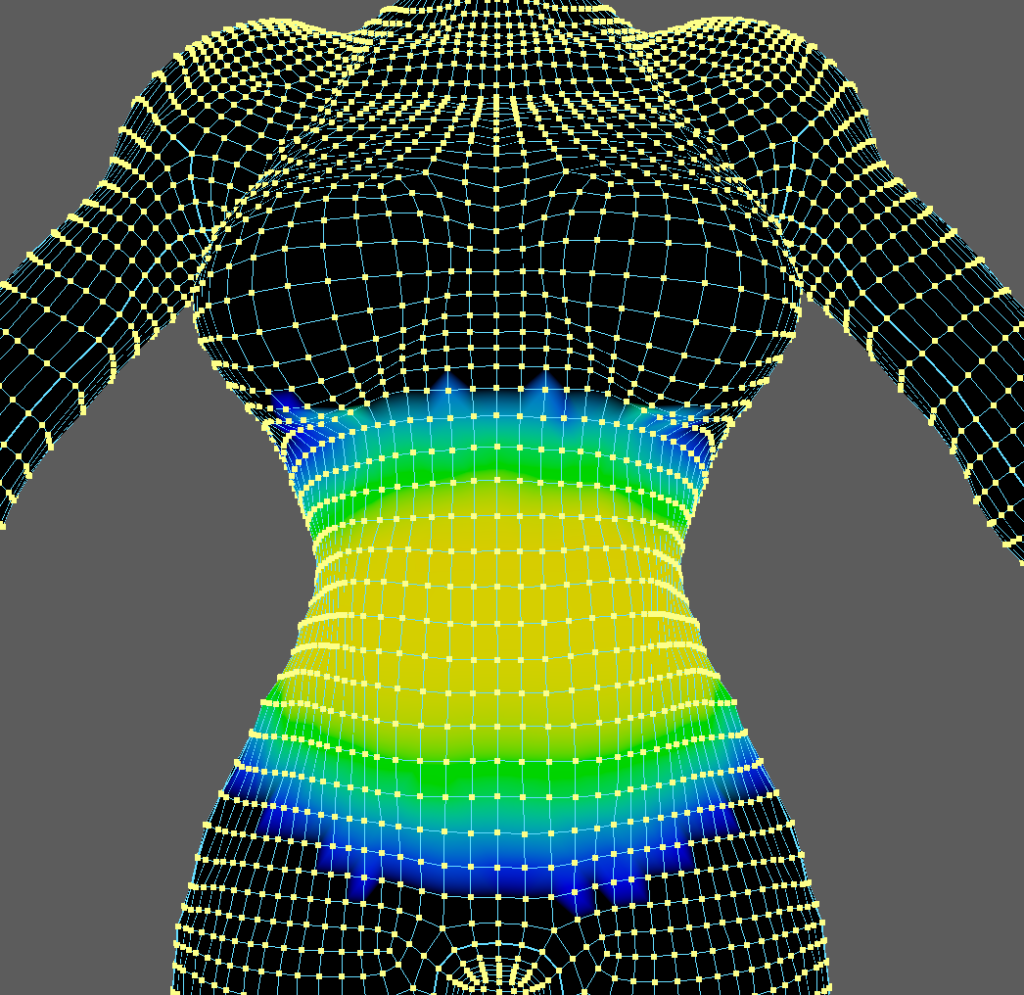
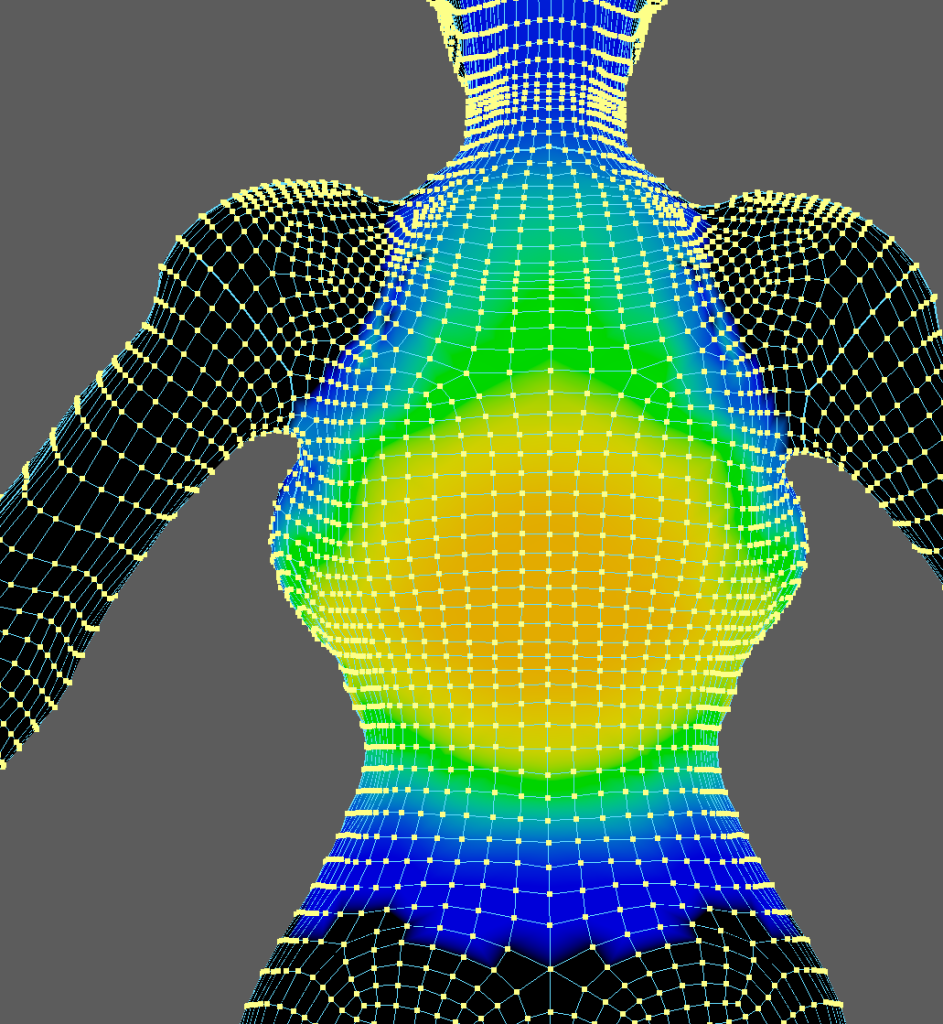
after completing the weight painting for the body i then did the easiest part of making the metal armour pieces unable to deform and follow the nearest bone and not be affected by any other part, and while i did have some minor issues up to this point this is where major issues started to form that almost made me use a different character as due to the baggy clothing that my character is wearing i had great difficulties figuring out how to properly weight paint the arms and chest area in particular, as i felt that no matter what i did or how much i tweaked the skin weight the robe would either look unnatural and deform wrong or the layers would be clipping through each other and this caused me issues for days if not weeks especially when the outer layer corset was also added to it and caused more clipping issues, after weeks of attemping to change and fix the clipping issues of the three layers i finally got it to a state that was not abysmal and while it is still not as good as i would have liked i do not think i could have done any better, after i finally managed to do the weight painting for the arms i double checked the weight on the rest of the character and fixed an issue with the body and the shorts clipping through the metal armour and then i felt it was at a state ready to start animating.
At this point in the process it was suggested that i combined the seperate meshes of my model into one to avoid problems later on so i did that and then selected the mesh and the origin of the skeleton and then using the bind skin tool bound the mesh to the skeleton, this means that the joints that i made can now control the body, maya uses a system of skin weight which means that each vertex has a value of 0-1 and the higher the value is to a joint the more the movement of that joint affects the vertex, on the original skin bind the weight painting was not very good and full of issues, this meant that i had to manually go through and adjust the skin weight of the character, i started this by selecting only the vertexes that make up the body and isolating them, then using reference images of how the body moves and deforms i tried to make the joints look as close to realistic as i could, i then repeated these steps on all of the different layers while keeping in mind how much a material would deform, for example cloth or skin would deform a fair amount with movement whereas a metal plate would not at all deform and instead just move.
animating
When i finally started animating i had very little time left due to my major setback with the weight painting, because of this the results ended up being worse than i had hoped for and some of which i would not even get to fully render before i ran out of time before i had to leave hull.
Even so using the timeline and setting keyframes after moving a part of the character i started to make my animations, i decided to start with the slam as it was the on that i was least confident in and i did not want to run out of time for if i left for later, to create this animation i started by marking the start, mid point and end of the axe’s movement and then filled in and adjusted any issues in the movement between keyframes, then i moved the character and made the body follow similar arc to the arm and axe, when i felt that the character and axe movement was as realistic as i could make it i started to make my way back on the timeline and add a few steps before the swing to add some momentum to the movement and make it overall smoother, even at the time i realised that not only were the steps both to far and too deep i did not have time to fix them as i had such little time for animating, this definitely did lower the overall quality of the animation but as it was my first attempt at animating and i had no time left i felt that i would just have to accept that it was not up to my standards and move on
The second animation sequence that i attempted was the simple walk cycle, as the only animating experience i had was my first animation sequence and i knew that the steps did not look right but i couldn’t put into words exactly why, after creating the leg and character movement the most difficult part of this sequence was the robe movement, especially since due to the exaggerated step size the robe would have to deform much more than it otherwise would, however once again i ran out of time to improve it and had to move on to my third sequence.
My third animation sequence is when i started to properly understand what i was doing and i finally realized exactly why the steps were too long, i was having the character lunge every time they took a step rather than a regular step, using this knowledge i created my third animation sequence which is the first that i was actually somewhat happy with and proud of, as the movement of both the axe and the arm look realistic and even the way that the hand grasps the axe seems well done.
After creating my third animation sequence i had around half a day left before i had to leave and so i ended up trying to remake the walking sequence and using what i learnt to create a much better result as i was rendering the third sequence, For this i used the regular step length and step height and created a walking sequence that i was much more proud of than the first, however i ran out of time after finishing it and when i attempted the renders i did not use the correct viewport and could not create a better render.
conclusion and results
In the end i had proper renders of the first sequence and the original walk sequence as well as a proper render of the third animation sequence with some minor issues that i did not notice until watching the render as well as two renders of the improved walking animation from the wrong camera angles, one of which had some minor clipping, overall i am mostly happy with my final two animation sequences i just wish that i had less trouble with the weight painting so that i could put more care an time into each one.